
4 Steps to Wax a Floor
Summary
– Step 1: Prepare the floor for waxing
– Step 2: Apply a hard primer
– Step 3: Wax the floor
– Step 4: Finishing and maintenance
Waxing a floor has more than an aesthetic purpose: the wax protects the wood from discoloration and drying.
To wax a floor, you must first sand it, then apply the wax, and finally polish it. This operation takes time (drying time), but you can easily do it yourself.
Here are the materials and steps to wax a floor.
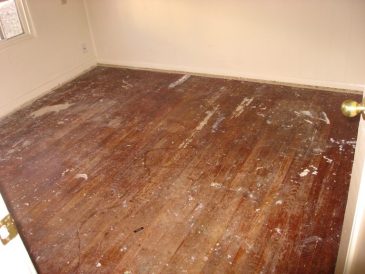
1. Prepare the floor for waxing
Before waxing your floor, you must prepare it so that it is clean and smooth.
Fill holes and cracks
If your floor has holes or cracks, you need to fill them. To do this, apply wood filler with a spatula and let it dry.
Also, check if any nails are sticking out of your floor. If so, remove them.
Sanding the floor
Sanding a floor generates a lot of dust and requires that you protect your eyes and respiratory tract. Wear goggles and a face mask when filing, and ventilate the room. You can also wear headphones to protect you from the noise of the sander.
To sand, the center of the workpiece surface, use a belt sander. This equipment is available for rent on the Internet or in specialized stores. After sanding, vacuum to remove dust.
Next, sand the edges and corners with an angle sander, also available for rent. Vacuum, mop the floor to remove dust, then let it dry.
2. Apply a hard primer
To achieve a beautiful finish and protect the floor, it is recommended to apply a hard sealer before waxing a floor.
Hard primer is a product used as an undercoat that fills the wood’s pores (top layers) to prevent liquids from soaking into the floor and staining it.
– Pour the product onto the floor. Refer to the manufacturer’s instructions for the correct dosage of the product.
– Using a soft brush, spread the product evenly on the floor.
– Allow the hard primer to dry for 24 hours.
– Then apply a second coat of hardener and let dry for 24 hours.
Caution: during the application and drying of the hardener, ventilate the room well and do not smoke. This product is highly flammable.
3. Wax the floor

There are three types of waxes:
– liquid wax, a mixture of wax and solvent;
– solid wax, which is melted in a water bath;
– encaustic, a wax paste that contains turpentine.
If you choose a wax with a pasty consistency, such as solid wax (which you will have melted) or encaustic, apply it with a cotton wick. If you choose liquid wax, use it with a brush.
– If you use solid or paste wax, melt it in a double boiler or warm it up by placing it on a radiator or in the sun.
– Pour the chosen wax onto the floor and spread it over the entire surface with the cotton wick or brush.
– Start with the part of the room opposite the door so you can get out without stepping on the wax, and work in areas.
– As you apply the wax, wipe off the layer of wax you just applied with a clean, lint-free cloth.
– Let dry for 24 hours.
– Then, apply a second coat of wax to achieve a perfect finish. Proceed in the same way as for the first coat.
– Let it dry again for 24 hours.
– Finally, polish the floor with wool cloth or sheepskin in a circular motion.
– You can also polish the floor with a single brush equipped with a clear pad. This machine is available for rent.
4. Finishing and maintenance
After waxing and buffing the floor:
- Wait at least 48 hours before walking around the room and replacing the furniture.
- When you return the furniture, be careful not to scratch the floor.
- Wait a few days before replacing a carpet or other decorative element in direct contact with the floor.
To clean your waxed floor, use a vacuum cleaner to remove dust, then wash it with a slightly damp mop.
To keep your waxed floor looking its best, reapply the wax every 6 months to a year.
Materials for waxing a floor
Wood paste
Spatula
Helmet, mask, and safety glasses
Belt sander
Angle sander
Hard bottom
Brush
Liquid, solid, or encaustic wax
Cotton wick
Wool rag or sheepskin
Single brush