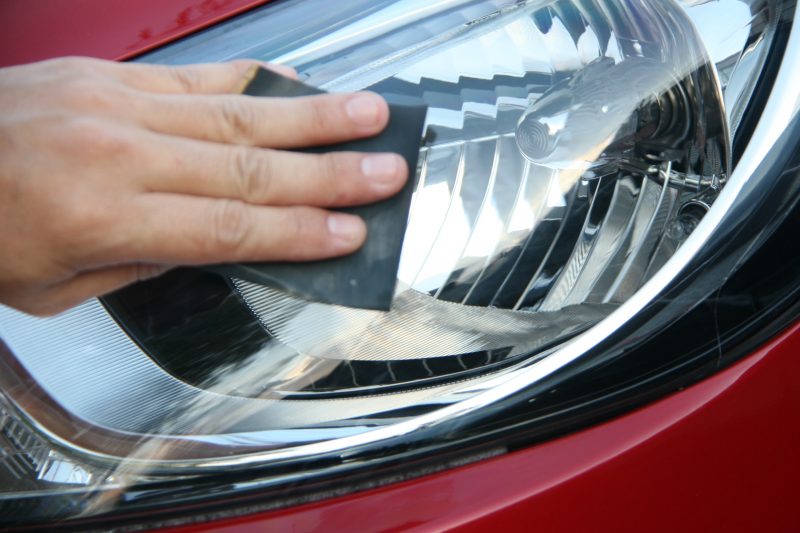
A car needs a lot of care, for example, often checking that the tread of the rims is not worn out of that the tire pressure shows the correct values. However, there is one thing that is not often paid attention to: the car’s headlights. When they start to show a more or less weak light, you should be concerned. That’s why, in today’s blog, we explain how to clean, polish and shine the headlights of a car.
If your car has deteriorated, dirty, yellowish or cloudy headlights, you need to polish, repair or clean them, because it is not only a question of aesthetic, but also a fundamental task to maintain a vehicle’s and its passengers safety. For example, at night, the light emitted by headlights is essential for proper and safe driving. If your headlights are dirty, yellowish and opaque, the light will be blurred and the lighting ineffective.
While really deteriorated headlights require professional polishing, we will bring you easy homemade polishing recipes will be a perfect option for headlights that are not too damaged.
Homemade Methods for Polishing Car Headlights
Some people say that homemade methods to polish car headlights with toothpaste or baking soda are a hoax. However, we have put them into practice and we have to say that… they work!
Of course, consider that these are not professional techniques, although the final outcomes will look quite spotless. The best thing about these methods is that they do not involve complexity or spending a lot of money.
Polishing Car Headlights With Toothpaste
One of the best (and proven) methods of cleaning and polishing your car headlights at home is to use toothpaste. The brand is indifferent and, moreover, it will not take you long to put it into practice. All you need to do is follow these steps:
- Thoroughly clean the car’s headlights with soap and water or a commercial window cleaner. You can also use white vinegar cleaner for this cleaning.
- Next, apply the toothpaste to the entire surface of the headlight so that it is well covered. Use a cloth or microfiber cloth for this task.
- Next, begin buffing the headlights with the cloth, making small circles until the entire surface is smooth.
- Then let the toothpaste dry for 5 to 7 minutes, and polish the headlights again. If you see that it’s very dry, spray a little vinegar on the headlight and buff.
- Finally, rinse with water and clean the headlights again with soap and water.
- After this work, you can apply a coat of headlight polish. You will notice the result of the polishing as you polish.
Polishing Car Headlights With Baking Soda
Baking soda will also be a great ally for cleaning and polishing car headlights at home. Better yet, all you need to do is create a polishing paste using some lubricating oil and baking soda. Once you have it, follow these steps:
- Clean the car’s headlights thoroughly with soap and water.
- Apply the paste to the entire surface with a cloth.
- Then polish the headlight by making small circles for 10 minutes. It’s hard work, but we assure you it’s worth it.
- Finally, remove excess product with soapy water and dry the entire surface with newspaper.
Polishing Car Headlights With a Repair Kit
The third method we teach you gives a more professional polishing, since we will use a headlight polishing kit. To apply this method, you will need: Masking tape, paper, three grit headlight sandpaper (800, 1200 and 2000), degreaser and polish.
Once you have all the elements, follow these steps:
- Put paper around the headlights carefully to prevent the sandpaper from damaging the car’s paint. In other words, you need to cover all the edges around the headlight with masking tape and paper.
- Start sanding the headlight
- Next, spray water on the headlight and start sanding with 800-grit sandpaper. The sanding should be even, in circles, and should take at least five minutes. If you see the headlight drying out, spray water again to make the sanding easier. The purpose of sanding is to remove all imperfections.
- Once you are done with the rough areas, clean the headlight with kitchen paper and sand it again. This time, use 1200 grit (finer) sandpaper. Follow the same method: polish in even circles for another five minutes. What we’re looking for is to refine the scratches we made with the 800-grit sandpaper.
- Shine the headlight again and use 2000 sandpaper (the finest of the three) to finish the polishing. Remember, always use circular motions for at least 5 minutes.
- The purpose of the varnish is to make the headlight transparent, to protect it from external agents, preventing it from being damaged again.
- Apply the varnish on the headlight
- Once you are done, give the headlight a good cleaning and check that the tape and the bodywork paper are intact. At this point, it is essential to clean the headlight with a degreaser to help the polish adhere better.
- Now it’s time for the varnish, a fundamental step for the headlight repair to last longer. We opted for an acrylic varnish (especially for the headlights).
- Now, when you apply the varnish, you have to do it in 10 minutes intervals and apply 2 consecutive coats of varnish on the headlight for each interval. By applying two consecutive coats, the varnish will be smooth and without lumps.
There you are! Do you know another home cleaning method for your car’s headlights? Let us know in the comments below.